Emma Lovell Yoga

This content shows Simple View


Category Archives anatomy

The best way to breathe…

‘The best way to breathe is the way that supports the activity that you are doing.’  Donna Farhi, The Breathing Book.
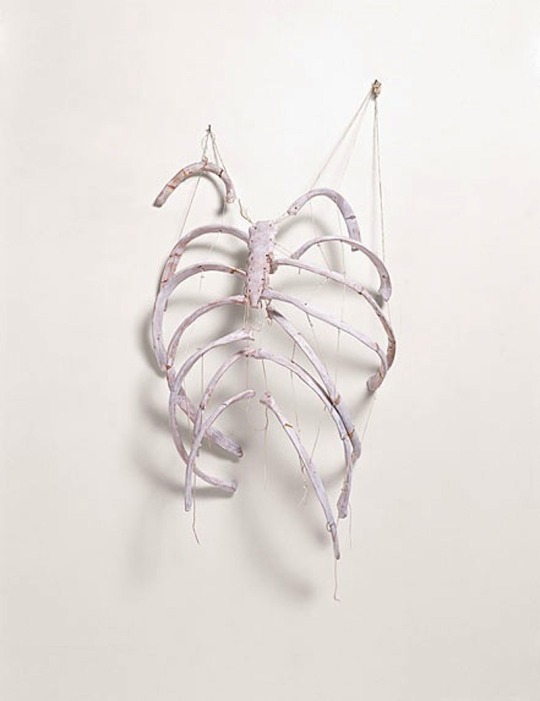
Kiki Smith – Ribs, 1987, terracotta, ink, and thread

It’s been all about the rib cage and breath in class this week.  Specifically focusing on how we are breathing with the thoracic cavity and aiming to create space and awareness in this area for a better quality breath.  Here’s biomechanist Katy Bowman explaining the mechanics of breathing and how the way you breathe affects the different pressure systems in the body:

Here are some movements you might want to try at home to help create space and release tension in this area:

IMG_20161013_184357584

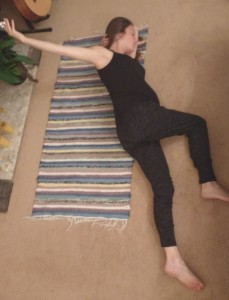
Side stretch

Walk hands and feet over to one side making sure pelvis and ribs don’t roll with you (they stay level).  You can cross one ankle over the other and take your wrist to make the stretch stronger.


IMG_20161013_184515733

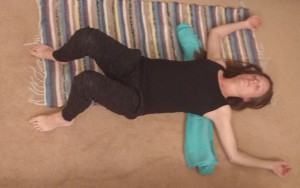
Pec/chest stretch

Lay on your back and bend your right knee up roll it to the left until the knee and foot are on the floor.  Keeping the leg in place, reach your right arm up to the ceiling.  Slightly bend your elbow and then slowly lower the arm behind you.  Imagine your arm is drawing away from you as you lower.  You can move the arm up towards your ear or down towards your hip to find the best stretch for you.


IMG_20161013_184813256

Chest opener

Place a rolled blanket or yoga mat under the upper back.  The blanket should come out under the armpits and shoulders release to floor.  Add a blanket under the head and neck if needed.


Some more tips for better breathing:

Here’s a great video from Jenni Rawlings which aims to optimise rib cage breathing.

Consider your wardrobe- make sure your clothing isn’t restricting how you breathe- think tight waist bands, belts, ties, in fact any clothing that restricts your movement full stop is bad news for the breath.

Consider your belly- are you holding your belly in right now?  Contrary to what is often thought, constantly holding your belly in will actually cause the muscles to weaken rather than strengthen, and like any muscle that is never allowed to relax, will eventually cause a reduction in function.  Not only this, but constantly holding in your belly increases tension in the body and restricts your breath as the abdominal muscles are unable to move freely (among other unpleasant side-effects):

‘Most people have replaced deep, abdominal activity with “sucking their stomach in.” The belief held by most is that “sucking it in” constantly uses one’s abdominal muscles, but really, the sucking-in motion creates a pressure (like creating a vacuum) that pulls the abdomen’s contents up (not in). It doesn’t do anything for core strength (except weaken it over time) or back health (increases the loads placed on the intervertebral disks).’ Katy Bowman

Happy breathing!
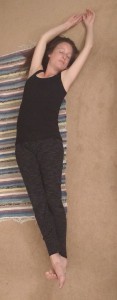


Untucking

‘Even though we now have only the beginning of what was once a real mammalian tail, it behaves the same. Untucking the tailbone opens the pelvic outlet, tucking it closes it — tightening the pelvic floor. The dog with his tail down between his legs is an equivalent of you sitting on your sacrum, the back supported by a chair or a couch. If you spend multiple hours a day in this position, your pelvic floor doesn’t really have a chance to release and allow the muscle fibres to regain their natural length at resting state. So gradually it shortens.’  From Yoga with Ivana blog


Shoulders

Raise your left arm into the air. Great. Now check and see if the shoulder joint also went into the air. Did it? Now, put the arm and the shoulder back down and raising your arm without taking your shoulder with it. How? By thinking “pull the left shoulder blade down as I lift my arm.” Why? Because arm movement should happen mostly at the shoulder joint and not so much between the shoulder and the neck. For better long-term shoulder health (and less neck tension) maintain those finer motor skills (look Mom, I can move JUST my arm), which keep the smaller muscles in the shoulder joint more mobile and well-circulating and reduces the pull on the vertebrae of the neck. How’d you do? Try the right side too!’  Katy Bowman, from blog post ‘Want Traps with that?’  Full article here

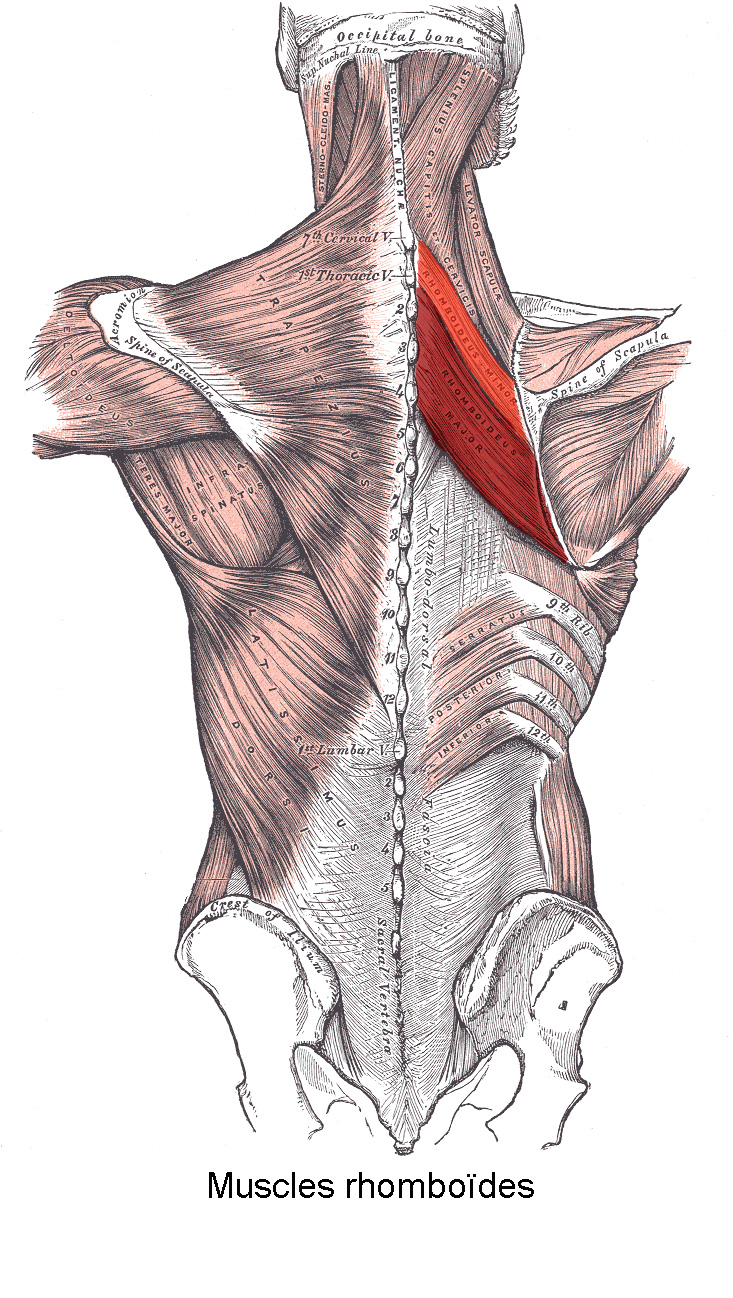
We’ve been fine tuning our arm and shoulder movement this week and trying to reduce neck tension in the process.  If you want to practice what we did in class at home then take a look at Katy Bowman’s ‘Alignment Snacks‘ which are roughly 20-30 minutes sessions on different areas of the body.  I recommend ‘Rhomboid Madness’ and ‘A Real Pain in the Neck’ if you want to repeat some of the exercises we did this week.

Also take a look at these two videos from Jill Miller’s Yoga Up®:


Finally here’s an interesting article on neck and head position to help avoid neck pain from Alignment Monkey.


How We Form and Move with Joanne Avison’

Grab a cup of tea, take a seat (or squat) and have a listen to this fascinating podcast from Joanne Avison on Liberated Body.  This will change the way you think about the body and how you move.  Here’s the synopsis:

Joanne Avison, author of Yoga, Fascia, Anatomy, and Movement, talks with me about fascia and why it has been overlooked historically (which includes a fascinating tour through the history of anatomy and its relationship to the Catholic church), how we form embryologically and what implications that has for biomechanics vs. biotensegrity (or biomechanics vs. biomotion). We also discuss what that changes when we have to reconfigure the language we use about movement and the body.

Click here for the interview.


The eyes

‘…our bodies are casted not only by what we do, but by what we don’t do. For example, many of us have “casted” the ciliary muscles of our eyes through exceptionally high amounts of close-looking (computers, smart phones, iPads, books, the walls of our homes, offices and classrooms) and exceptionally low amounts of looking to great distances.’  Katy Bowman.  See full article here for further explanation.


Here are a few exercises you might like to try to improve muscle weakness around the eyes and to help eyes strain.


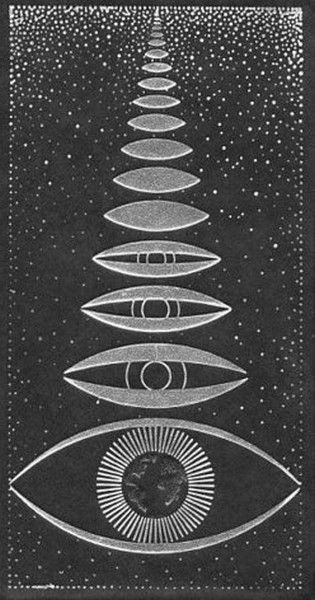
tibetan eye chart

For generations the people of Tibet have used natural methods to correct visual weakness and improve their eyesight. Chief among the methods employed has been the use of certain exercises which have proved useful over long periods of time. The figure on this chart was designed by Tibetan Lama Monks to give the necessary corrective exercises and stimulation to the muscles and nerves of the optical system. The eye Muscles focus similar to a camera shutter. The purpose of these exercises is to strengthen the eye muscles to improve vision. Practice a few minutes morning and evening and see if you notice its effects.

How to Use the Chart

These exercises are to be done without eyeglasses or contacts. Do each movement for 30 seconds while in a sitting position, spine straight and do not move the head side to side. Move only the eyes.

1.) With the palm of each hand cup both closed eyes to relax them.

2.) Move the eyes clockwise around the outer circle of dots

3.) Repeat this movement in a counterclockwise rotation

4.) Move the eyes back and forth between the dots at 2 and 8 o’clock

5.) Repeat this movement back and forth between dots at 4 and 10 o’clock

6.) Blink the eyes briefly and finish therapy with the palming same as exercise #1

Repeat exercises as desired being careful to avoid strain.

Source:  http://www.wellnesshour.net/tibet.htm via here.


Here’s a couple of exercises from this article in Yoga International:

1. Palming

 Rub your hands together for 10 to 15 seconds until they feel warm and energized. Then gently place your hands over your eyes, with the fingertips resting on the forehead, the palms over the eyes, and the heels of the hands resting on the cheeks. Don’t touch the eyeballs directly, but hollow the hands slightly and allow them to form a curtain of darkness in front of the eyes. Close your eyes, breathe deeply, and relax. Envision the eyes absorbing the darkness like a sponge, while also welcoming healing warmth and energy from the hands. Invite the eyes to grow soft and spacious, and enjoy this break from visual stimulation. Continue this palming action as long as it feels soothing—for just a few seconds or up to five minutes. When you are ready to emerge, gently remove the hands from the face and slowly open the eyes.

This palming technique can also be done after the eye exercises that follow to further rest the eyes.

2. Eye Rolling

 Sit upright with a long spine and relaxed breath. Soften your gaze by relaxing the muscles in your eyes and face. Without moving your head, direct your gaze up toward the ceiling. Then slowly circle your eyes in a clockwise direction, tracing as large a circle as possible. Gently focus on the objects in your periphery as you do this, and invite the movement to feel smooth and fluid. Repeat three times, then close the eyes and relax. When you’re ready, perform the same eye-rolling movement three times in a counterclockwise direction.


As with all movements in the body, variation is key- try to vary your focus by spending some time looking at the furthest thing you can see in the distance, watch sunsets, sunrises, the horizon.  Give your eyes a real break and test your proprioception by practicing a sun salutation with your eyes closed, try a balance with your eyes closed and notice the difference.


Bones

Here’s an article from Todd Hargrove explaining why and how our skeletal structure affects our movement and why an individualised approach is so important in exercise, rather than forcing each body into ‘some Platonic ideal’: ‘Optimal alignment or posture for a certain function is partly a result of having as many joints in neutral as possible at any one time. And the shape of the bones will determine how many of your joints you can keep in neutral at the same time in a particular functional task…we should be very wary about anyone dictating to us what proper form is in regard to a particular activity without considering our individual variations in structure.‘ Full article here

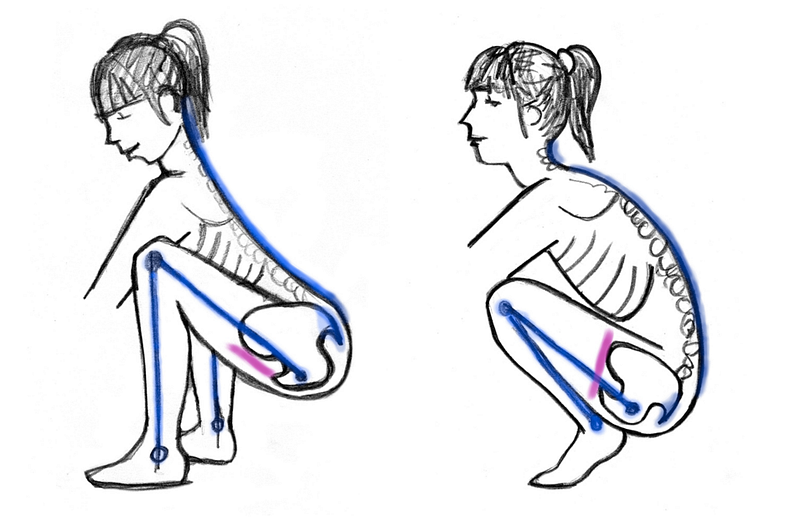
Here are some very clear illustrations of anatomical variations in pelvic and femur structure- a squat for these two individuals will (and should) look very different:Pic 1

pic 2

pic 3

pic 5

Images from here


Individual practice

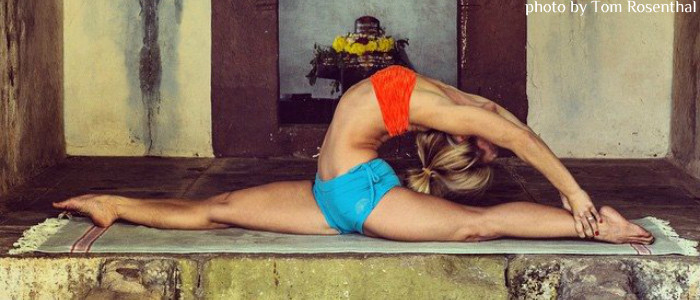
A couple of articles here on the changing approaches to yoga.  First, the brilliant Matthew Remski writing about  ‘extreme practice and injury in asana’ and also touching on the online trend of posting pictures of extreme yoga poses which, for most of us, are completely inaccessible.

‘Pattabhi Jois was fond of the adage, “With enough heat, even iron will bend”. But this new rationalist yoga discourse imposes clearer limits upon the aspirational body, insisting that muscles do not get “longer”, and pain is not an “opening” – except in a pathological sense. The primal dream of bodily transformation through “being worked into a noodle”, as Jois student Annie Pace described it, is being eclipsed by the simpler goal of enhancing a natural range of motion for functional movement.’ See more here.


On a similar note, Jenni Rawlings discusses how our different body proportions affect our practice, stressing the importance of moving away from the ‘one-pose fits all’ approach in yoga, which can force the body into shapes that could cause injury by focusing on the aesthetics of the pose:

In the yoga world, we often conceive of asanas as having one final form that we are all striving to “achieve” or “finish.” But when we learn to appreciate the role that our unique body proportions play in what our specific yoga poses look like (or how hard we might be working in our shapes), we can start to broaden our notion of what it means to “progress” in yoga practice. Ultimately, our top priority in any asana should be for the shape to serve the individual body performing it; how the pose looks will then be a natural byproduct of that goal.’  For the full article see here


More on stretching…

Another interesting article to add to the ‘stretching’ debates:

‘Even the stretched out yogi who can put their hands on the floor can have areas of the hamstrings that are painful and held very tight.  Everything around that tight spot is so loose and limber to allow the movement in the joint, but the careful ‘combing through’ the tissue I do as a bodyworker reveals these islands of supreme tension within the ocean of availability.’

Full article here